What is Dexterity?
Dexterity is a complete Integrated Development Environment (IDE) and the native language of Dynamics GP.
You can create the tightest, most seamless integrations using Dexterity.
Dexterity is powerful application development system for GP.
Capabilities of Dexterity
Access and manipulate all of the resources exposed by the Dynamics.dic file.
Create your own version of an existing window to use in place of the original Dynamics GP window (an Alternate Window).
Create new reports using the built-in report writer.
Create your own version of an existing report to use in place of the original Dynamics GP report (an Alternate Report).
Use the sanScript scripting language to create business logic that extends existing Dynamics GP functionality or creates wholly new functionality. Scripts can respond to user actions such as pushing a button, changing a field, or closing a window.
Use Dexterity triggers to watch for events such as opening a window or tabbing off a field. You can trigger off events in any customization written in Dexterity; you are not limited to just the Dynamics.dic file. When the trigger fires, it runs a procedure written by you.
Use the integrated debugging tools to debug your application, even when your application is running in multidictionary mode.
Provide access to end-user customization tools such as Report Writer, Modifier with VBA, and the Import utility.
Limitations of Dexterity
You cannot modify a form in a third-party dictionary, meaning you cannot modify a Dexterity window that lives in a dictionary other than the dynamics.dic file.
Dexterity does not support Unicode; so if you need support for Chinese, Japanese, and Korean hieroglyphs, you have a problem to solve
Dexterity cannot access fields added using the Modifier tool; therefore, you cannot attach sanScript code to those fields
Dexterity does not support dynamically loading images from a database
What are the Basic Development skills for the Dexterity Developers
Thorough knowledge of the sanScript scripting language
Experience working with the data model of Dynamics GP
Experience navigating the user interface of Dynamics GP
A proficiency in database design
An understanding of SQL Server
An understanding of SQL Server stored procedures
What are the tools built into Dexterity System?
1. Modifier with VBA
The Modifier is an interface customization tool that’s available to your application’s users
2. Report Writer
Report Writer is a report generation and customization tool available to your application’s users. This tool is similar to the Dexterity Report Writer, allowing users access to the same tools you use to create your application’s reports. Users can design reports based on original reports in your application, create copies of your original reports, change a report’s layout, add new functionality and add fields from multiple tables without affecting your original report.
3. Import Utility
The Import Utility is a tool that allows users to import data into your application. To do this, users create an import definition that maps data in a comma- or tab-delimited text file to the appropriate table in your application. The Import Utility uses an intuitive point-and-click method that allows data from a text file to be easily viewed and associated with fields from your application’s tables.
4. Resource Descriptions
The Resource Descriptions tool allows your users to view information about your application dictionary. This tool is designed to be used with a variety of products that enhance your application, including Dexterity, the Import Utility, the Report Writer and the Modifier
5. COM
Dexterity applications support Microsoft’s Component Object Model (COM). COM allows external applications like Microsoft’s Visual Basic or Borland Delphi to integrate with Dexterity-based applications through Automation.
6. MAPI
Dexterity supports Microsoft’s Mail Application Program Interface (MAPI). This allows you to mail reports to users also configured with a MAPI mailbox. The report will be sent as an attachment file to the mail destination you select in a MAPI dialog box.
What are the futures built into the Dexterity System ?
1.Network operation : Applications you create in Dexterity can be configured to operate across a variety of local area networks (LANs).
2. Multiuser operation: Dexterity supports multiple users accessing the same data at the same time. To accommodate this, Dexterity applications apply Optimistic Concurrency Control (OCC), a form of record locking that allows multiple users to work in the same tables and access the same records with minimal restrictions, while helping to ensure data integrity.
3. Database independence: Internally, Dexterity has a Data Management Subsystem that takes generic data requests and translates them into the specific calls needed to access data from the chosen database. You write your application independent of a specific database type. This allows your application to use any of the database types supported by Dexterity.
4. Client/server architecture: Dexterity applications can operate in a client/server environment, which allows you to separate data management tasks from processing and display tasks. By distributing these tasks between a client computer and a server computer, you optimize the use of your computing resources.
5. Process Server: Processes are distributed between client and server workstations using the Process Server. With the Process Server, you can send certain processes – such as posting data or printing reports.
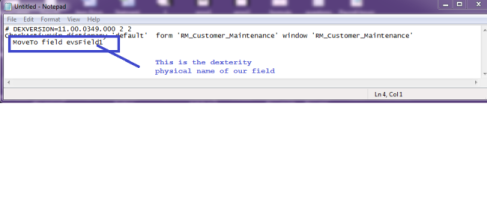
6. Macro system: The Dexterity macro system allows your users to play and record macros, allowing your users to automate tasks throughout your application. The macro system is also used while testing your application.
7. Security: You can implement security in any Dexterity application. Security allows you to control exactly which forms, reports and tables users of your application can access.
8. Pathname support: Pathname support allows your application to store information in designated locations. Dexterity applications have built-in support for pathnames
How many types of Application in Dexterity?
Dexterity allows you to create two different types of applications.
Stand-alone applications:
Stand-alone applications are created by Dexterity developers who want to develop applications that are independent of any other application.
Although Dexterity was initially designed to create Microsoft Dynamics GP, Although Dexterity was initially designed to create Microsoft Dynamics GP, you can use Dexterity to develop stand-alone applications.
Many standard application features that are available to developers who create applications that integrate with Microsoft Dynamics GP, such as security, pathname support and online help.
Integrating applications:
The runtime engine included with Dexterity allows one or more dictionaries to function at the same time. This type of development environment is known as a multi dictionary environment. If your application integrates with Microsoft Dynamics GP, this feature allows your application to share resources with the Microsoft Dynamics GP system and function simultaneously. If you’re developing a stand-alone application, other dictionaries may operate simultaneously with your application, but not share resources.
Explain the Basic Development Process in Dexterity
1. Interface design: Dexterity uses a combination of two different dictionary resources to establish your application interface.
Forms :Forms are used to organize windows, menus, tables and scripts into logical groups based upon the tasks being performed.
It’s important to remember that forms don’t appear directly in your application the same way a window or a report does.
Instead, they’re used to organize other resources that function together to complete a specific task, such as allowing a user to enter, maintain and print item records.
Although forms aren’t a visual element of your application’s interface, they provide the organization and structure that is the basis of how your application presents itself to the user.
A form groups together one or more windows, tables, menus and scripts, all of which work together to perform a specific task in your application
Windows: Windows are used to display fields and controls, such as push buttons, list boxes, scrolling windows and check boxes.
Windows allow users to interact with your application. They are the primary mechanism an application’s user will use to enter and manipulate data
Dexterity uses a WYSIWYG (what you see is what you get) window layout tool that allows you to quickly and easily create windows. This drawing environment allows you to quickly combine data-entry fields and window controls with static items such as lines, rectangles, pictures and text.
The layout window allows you to add a variety of window controls, such as push buttons, list boxes, multi-select list boxes, radio buttons, drop-down lists, scrolling windows and visual switches.
When you design windows using Dexterity, you don’t have to add native window controls, such as Windows resize controls. These controls are displayed automatically when Dexterity or the runtime engine is used to run your application
2. Database development
Dexterity uses a combination of dictionary resources to specify how data is stored in an application
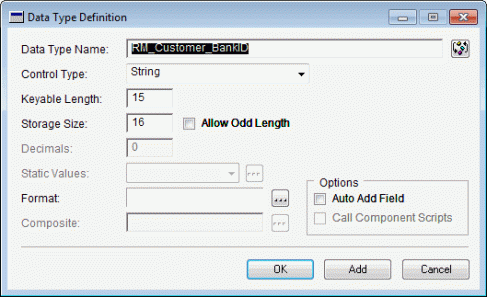
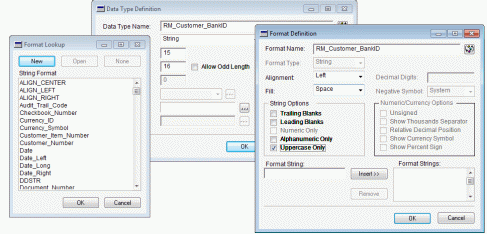
Data types : Dexterity allows you to define a wide range of standard data types, including string, integer, currency, text and Boolean data types. A data type resource establishes a set of data storage and display instructions for fields that use that data type. Several fields can use the same data type.
Fields : Fields represent individual pieces of information in an application. Each field in an application uses a data type to specify its characteristics. Many fields can use the same data type. Fields can be used on windows and stored in tables. In the previous illustration, the Description, Customer Address and Company Name fields use the String30 data type.
Tables : When you define a table resource for your application, you group related field resources. This grouping is called a record. For instance, a record could include fields for a unique part number, a description, an item cost, selling price and a status. Together, these fields are used to create the Inventory Data table.
Currently, Dexterity supports three database managers that manage the tables in your application: Pervasive.SQL, c-tree Plus, and Microsoft SQL Server.
The Pervasive.SQL database manager is used by applications that access data on a local workstation or on a network. It is also used by applications that access data on servers running Pervasive.SQL for Windows NT.
The c-tree Plus database manager is used by applications that use c-tree Plus. It supports single-user operation and multiuser operation.
The SQL database manager supports access to Microsoft SQL Server 7.0 and Microsoft SQL Server 2000.
3. Report generation :
You will use the Dexterity Report Writer to create reports. The report layout allows you to design reports that present information from your application’s tables. Reports can be printed to a screen, printer or data file. Reports are composed of several sections, each representing an area on the report, such as the report header, report footer, and the main body.
Printing reports in your application is relatively easy. Simple sanScript commands allow you to print reports from objects such as menus or push buttons. For instance, the Inventory Report is printed using the run report sanScript statement
4. Scripting :
You will use sanScript, Dexterity’s scripting language, to add functionality and logic to your application. SanScript was developed specifically for Dexterity to provide functionality tailored to the requirements of graphical business applications. Unlike many traditional third-generation languages (such as Pascal or C) which require you to write long pieces of program code, sanScript is written in small segments, or scripts, that are attached to resources, such as fields, windows, forms and menus, in your application.
This script-based approach and sanScript’s English-like instructions are designed to make Dexterity applications easier to write than applications written with other languages. If you’ve had experience writing programs in other languages such as Pascal or BASIC, you will find sanScript very easy to learn.
What are the basic components required to the dexterity?
Depending on the installation options you selected when you installed Dexterity, some additional software, such as the Process Server, may have been installed as well. After you complete the Dexterity installation, the directory where you installed Dexterity will contain the following files
|
File
|
Description
|
|
DEX.EXE
|
The Dexterity application. You can double-click this file to launch Dexterity.
|
|
DEX.DIC
|
A dictionary used by the Dexterity and Dexterity Utilities applications.
|
|
RUNTIME.EXE
|
The runtime engine used to run your application dictionary in a runtime environment.
|
|
DEXUTILS.EXE
|
The Dexterity Utilities application. Although this software isn’t necessary for Dexterity to operate properly, it is necessary to perform dictionary maintenance.
|
|
DEXUTILS.DIC
|
A dictionary used by the Dexterity Utilities application.
|
|
IMPORT.CHM
|
The help file for the Import Utility.
|
|
RESDESC.CHM
|
The help file for the Resource Descriptions tool.
|
What are the database supports to the dexterity?
Dexterity supports 3 types of databases
c-tree Plus, Pervasive.SQL, and Microsoft SQL Server
Tables in dexterity
Tables store data generated and used by your application. When you create tables in Dexterity, you’ll use or define several elements required for tables to store and access information properly, such as fields, keys and table relationships. Before you create tables, be sure you’ve defined all the fields that you’ll be using to store information in the table.
If you’re creating applications that integrate with Microsoft Dynamics GP, be aware that Microsoft Dynamics GP table structures can’t be modified. Additional information must be stored separately in tables you add
Each table has a table name, display name, physical name, series, database type, table fields, keys, key options, segment options and table options. Use the Table Definition window to create tables.
Names:
Three names are required for each table.
The table name is the name that is used in scripts to refer to the table. To make the name easier to use in scripts, you can use underscores (_) between parts of the name instead of spaces.
The display name is the name that appears when the name of the table is displayed on the screen in an application. This name is usually the same as the table name, but typically has spaces between parts of the name, rather than underscores.
The physical name is the name under which the table is stored by the operating system or database. By default, this name can be up to eight characters long and must conform to the operating system standards for the system running Dexterity. The appropriate extension, if required, is added automatically.
Example
|
Table Name
|
Customer_Data
|
|
Display Name
|
Customer Data
|
|
Physical Name
|
CUSTDATA
|
What is the table physical name length?
Dexterity allows you to enter table physical names up to 24 characters long.
we can updated this length Edit Menu –> Options–>Table Options –>Allow long physical Table Name.
Dexterity Limits
The following is a list of limits for the Dexterity development system.
|
Resource
|
Category
|
Limit
|
|
Arrays
|
Size
|
Up to 32,767 elements in an array.
|
|
Constants
|
Name
|
Cannot exceed 79 characters.
|
|
Dynamic Link Libraries (DLLs)
|
Parameters
|
You can pass a maximum of 255 parameters to a DLL.
|
|
Fields and data types
|
Composites
|
The maximum displayable length is 128 characters, including separator characters.
|
|
Standard composites can have up to 9 components.
Extended composites can have up to 128 components.
|
|
Button drop list
Drop down list
List box
Non-native list box
Visual switch
|
Can display a maximum of 32,767 items, each up to 79 characters long.
|
|
ListView
|
Maximum of 256 columns.
|
|
Can have up to 15 state images.
|
|
Can use up to 4 different overlay images at one time.
|
|
Multi-select list box
|
Can display a maximum of 32 items.
|
|
Can display a maximum of 79 characters per line.
|
|
Picture
|
Can store images having sizes up to 32,767 bytes.
|
|
Push button
|
One default button per window.
|
|
One cancel button per window.
|
|
String
|
Maximum keyable length is 255 characters.
|
|
Text
|
Can store a maximum of 32,000 characters.
|
|
Tree View
|
Can have up to 15 state images.
|
|
Can use up to 4 different overlay images at one time.
|
|
Forms
|
Total number
|
Maximum of 8191 forms per dictionary for Windows Help to be supported properly.
|
|
Global fields
|
Total number
|
Maximum of 8191 global fields per dictionary for Windows Help to be supported properly.
|
|
Global variables
|
Total size
|
There can be up to 64K of global variables.
|
|
Local fields
|
Total number per form
|
Maximum of 8191 local fields per form for Windows Help to be supported properly.
|
|
Menus
|
Displaying
|
Application can display a maximum of 15 menus at a time.
|
|
Messages
|
Length
|
The maximum length of the message, including all arguments in the message, is 255 characters.
|
|
Native pictures
|
Size
|
Native pictures can be up to 32,767 bytes.
|
|
Pictures
|
Size
|
Pictures in the picture library can be up to 32,767 bytes.
|
|
Procedures
|
Parameters
|
Can include a maximum of 255 parameters.
|
|
Up to 32K of parameters can be passed to and from a procedure.
|
|
Reports
|
Additional footers
|
Can have up to 15 additional footers.
|
|
Additional headers
|
Can have up to 15 additional headers.
|
|
Legends
|
Up to 255 legends can be added to a layout.
|
|
Text fields
|
Can display up to 10K of text on a report.
|
|
Scripts
|
run script statement
|
Can have a maximum of six levels of scripts started with the run script statement.
|
|
Local variables
|
Scripts can have up to 64K of local variable space.
|
|
Script size
|
Scripts can be up to approximately 24,000 characters long, including spaces and comments.
|
|
Static strings
|
Length
|
Can be up to 79 characters in length.
|
| |
|
|
|
Tables
|
Keys
|
16 keys per table (Dexterity limit).
|
|
255 bytes per key (Dexterity limit).
|
|
Open tables
|
The maximum number of open tables is approximately 95.
|
|
Ranges
|
Only one range per table buffer.
|
|
Record size (Fixed-length portion)
|
Maximum of 4,088 bytes (approximately 4K) for Pervasive.SQL
|
|
Maximum of 32,767 bytes (32K) for c-tree.
|
|
Maximum of 8,060 bytes for SQL.
|
|
Record size (Variable-length portion)
|
32,767 bytes (32K) for Pervasive.SQL and c-tree.
|
|
Columns
|
255 columns per table (SQL limit).
|
|
Segments
|
16 segments per key (Dexterity limit).
|
|
119 segments per table for Pervasive.SQL.
384 segments per table for c-tree.
1024 segments per table for SQL.
|
|
Sorting
|
Dexterity can sort tables of up to 1,000,000 records.
|
|
Table access
|
One table buffer per table per form.
|
|
User-defined functions
|
Parameters
|
A maximum of 254 parameters, plus the return value.
|
|
Up to 32K of parameters can be passed to and from a user-defined function.
|
|
Virtual tables
|
Number of tables
|
Up to 16 standard tables as part of the virtual table.
|
|
Keys
|
16 keys for the virtual table.
|
|
Relationships
|
Only one main branch can have 1-to-many relationships.
|
|
Windows
|
Auto-linking
|
A window can be auto-linked to one table.
|
|
Objects per window
|
A window can contain up to 32,767 objects.
|
|
Selecting objects
|
You can select up to 200 objects in a window layout at one time.
|
|
Tool bar windows
|
Only one tool bar window can be open in an application at one time.
|
|
Total number
|
Maximum of 15 windows per form for Windows Help to be supported properly.
|
FORMS
After you create data types, fields and tables, you can begin setting up your application interface by first defining the forms and then the windows your application will use. Although forms and windows are stored as separate resources in the Dexterity development system, both work together to give structure to the tasks you’re designing your application to complete.
Form Elements
Name
Forms can be given any name, but if your application is stand-alone, there are two specially named forms that should be part of your application.
Series
When you create a form, you must specify the series the form is part of. The form series allows you to group related forms in a Dexterity application together using categories like Sales, Financial and System. For example, you could assign all of the forms used in an Inventory application to the Inventory series. You will use these series groupings when you use the Modifier or use Dexterity Utilities to perform dictionary maintenance activities
Attached tables
Tables must be attached to a form so the windows associated with the form will have access to the information in the tables. You must attach the tables to the form before you can reference the tables in scripts
Windows, menus, constants, commands and scripts
Each form can have windows, menus, constants and scripts associated with it
WINDOWS
After you create a form, you can create the windows that will be part of that form. A window is the main method of communication between the user and your Dexterity application. It consists of the visual area displayed on the screen that contains editable fields, interactive controls and static items such as text or pictures.
Window elements
Name : Two names are required for the window. The window name is used in scripts to refer to the window. Window names are easier to use in scripts when they have underscores (_) between parts of the name instead of spaces.
Window Types: The type of window you create is specified by the WindowType property in the Properties window. Dexterity allows you to choose from seven window types: primary, modal dialog, modeless dialog, lookup, wizard, palette and toolbar
1.Primary windows are the most common type of window and appear with all operating system controls, such as close boxes and minimize controls.
2. Modal dialogs don’t contain any operating system controls and can’t be resized. These windows can be used when you require the user to complete an action in the window before closing the window.
3. Palette windows can be used as a device for navigation throughout your application. Palette windows are similar to the tear-off menus found in other applications. Palettes are used to group windows or tasks that perform similar functions, such as windows you use to maintain inventory items.
Reports
Reports allow you to retrieve data from your application’s tables and present it to users in an organized manner. A report can be as simple as a mailing list or as complex as a year-end account reconciliation. It can be based on data in a single table or in multiple tables.
Dexterity allows you create two different types of reports: graphics reports and text reports. Unless otherwise specified in the Report Definition window, all reports created with the Report Writer are graphics reports
San scripting language
General syntax
SanScript is a relatively easy language to learn, but you must follow some basic rules when you write scripts.
- SanScript is case-sensitive, as are names of fields, windows, forms, menus and other resources. All keywords in sanScript must be lowercase.
- Each statement in a script must end with a semi-colon. Statements can span multiple lines.
- Comments can appear anywhere in a script. They must be bounded by braces – { } – and can span multiple lines.
- If a script has parameters or local variables, these must be declared at the beginning of the script before any other lines in the script.
- Each script must be less than 24,000 characters in length, including spaces and comments.
Data types in sanScript
|
Storage type
|
Description
|
Control types
|
|
Boolean
|
A value of either true or false.
|
Boolean
Check box
|
|
Currency
|
A currency value in the range [-99,999,999,999,999.99999 to 99,999,999,999,999.99999]. The decimal point is implied in the number, but not stored. For display purposes, currency values are limited to 14 digits to the left of the decimal and 5 digits to the right.
|
Currency
|
|
Integer
|
An integral number in the range
[-32768 to 32767].
|
Button drop list
Drop-down list
Group box
Integer
List box
Non-native list box
Progress indicator
Visual switch
|
|
Long
|
An integral number in the range [–2,147,483,648 to 2,147,483,647].
|
Long integer
|
|
String
|
A sequence of up to 255 characters.
|
Combo box
String
|
|
Text
|
A sequence of up to 32,000 characters.
|
Text
|
|
Date
|
Date based upon the Julian calendar.
|
Date
|
|
Time
|
Time based on the 24-hour standard.
|
Time
|
|
DateTime
|
A combined date and time value used for COM integrations.
|
None
|
|
Variable Currency
|
A currency value with up to 23 digits. Up to 15 digits of the number can be used for the decimal portion.
|
Currency (variable
|
Variables
Variables allow an application to temporarily store values used by the application. Dexterity has two types of variables: local variables and global variables.
Local variables
Local variables are specific to a single script and are active only while the script is running.
local integer number_of_dozen;

number_of_dozen = 'Quantity' / 12;
Global variables
Global variables are active the entire time a Dexterity application is open, so they’re available to any script in the application dictionary, at any time. Global variables are used to store information that affects the entire application
if Printing_Status of globals = “Yes” then
run report Customer_List;
else
warning “Printing is currently disabled. Try again later.”;
end if;
Operators
This section lists the operators supported in sanScript. Examples show how each operator is used in the different types of expressions
|
Operator
|
Description
|
Example
|
|
unary minus (-)
|
In numeric expressions, the unary minus operator (-) indicates a negative value.
|
neg_val = –10;
|
|
addition (+)
|
In numeric expressions, the result is the sum of the two values.
|
total = subtotal + 5;
|
| |
In string expressions, the result is the concatenation of the first and second strings.
|
name = “Steve ” + “Jones”;
|
| |
In date expressions, a numeric quantity may be added to a date to form a new date. The numeric value is treated as a number of days.
|
due_date = sysdate() + 30;
|
| |
In time expression, a numeric quantity may be added to a time value to form a new time value. The numeric value is treated as a number of minutes.
|
next_hour = systime() + 60;
|
|
subtraction (-)
|
In numeric expressions, the result is the difference of the two values.
|
total = price – discount;
|
| |
In date expressions, a numeric quantity may be subtracted from a date value to form a new date value. The numeric value is treated as a number of days.;
|
yesterday = sysdate() – 1;
|
| |
Two date values can be subtracted to find the difference between them in days.
|
days_to_pay = due_date – sysdate();
|
| |
In time expressions, a numeric quantity may be subtracted from a time value. The numeric value is treated as a number of minutes.
|
start_time = systime() – 30;
|
| |
Two time values can be subtracted to find the difference between them in minutes.
|
elapsed_time = start_time – end_time;
|
|
multiplication (*)
|
The multiplication operator (*) is used in numeric expressions. The result is the product of the two numbers.
|
total = number_of_periods * contribution;
|
|
division (/)
|
The division operator (/) is used in numeric expressions. The result is the quotient of the two numbers.
|
check_total = salary / number_of_pay_periods;
|
|
modulus (%)
|
The modulus operator (%) is used in numeric expressions. The result is the remainder of the division of the first number by the second number (for example, 71 % 10 = 1).
|
single_items = items_ordered % items_per_box;
|
|
power (^)
|
The power operator is used in numeric expressions. The result is the first operand raised to the power of the second operand. Only powers of 10 may be calculated.
|
number = 10 ^ 5;
|
|
<< or shiftl
|
The shift left operator is used with numeric expressions. The result is the supplied integral value with its bits shifted to the left a specified number of positions. Zeros are shifted into the value.
|
result = 16 << 2;
result = 8 shiftl 3;
|
|
>> or shiftr
|
The shift right operator is used with numeric expressions. The result is the supplied integral value with its bits shifted to the right a specified number of positions. Zeros are shifted into the value.
|
result = 16 >> 2;
result = 256 shiftr 3;
|
|
equality (=)
|
The equality operator is supported in numeric, boolean, string, date and time expressions. In all expressions the result is true if the two operands are equal, and false if they are not equal.
|
if total = 100 then
result = true;
end if;
|
|
inequality (<>)
|
The inequality operator is supported in numeric, boolean, string, date and time expressions. In all expressions the result is false if the two operands are equal, and true if they are not equal.
|
if password <> “access” then
abort script;
end if;
|
|
less than (<)
|
The less than operator is supported in numeric, string, date and time expressions. In all expressions the result is true if the first operand is less than the second operand, and false if it is not.
|
if total < 100 then
warning “Total is not 100%”;
end if;
|
|
greater than (>)
|
The greater than operator is supported in numeric, string, date and time expressions. In all expressions the result is true if the first operand is greater than the second operand, and false if it is not.
|
if current_date > sysdate() then
warning “Date is not valid.”;
end if;
|
|
less than or equal to (<=)
|
The less than or equal to operator is supported in numeric, string, date and time expressions. In all expressions the result is true if the first operand is less than or equal to the second operand, and false if it is not.
|
if systime() <= posting_time then
warning “Posting can’t begin.”;
end if;
|
|
greater than or equal to (>=)
|
The greater than or equal operator is supported in numeric, string, date and time expressions. In all expressions the result is true if the first operand is greater than or equal to the second operand, and false if it is not.
|
if total >= 100 then
discount = 10;
else
discount = 0;
end if;
|
|
and
|
In boolean expressions, the result is true if both of the operands are true, and false if either of the operands is false.
|
if (count > 100) and (total > 0) then
set discount to 15;
end if;
|
| |
In numeric expressions, the and operator performs a logical and operation of the corresponding bits of two integral values and returns the result.
|
result = status and 16;
|
|
or
|
In boolean expressions, the result is true if either of the operands is true, and false if both of the operands are false.
|
if (count > 100) or (total > 100) then
discount = 20;
end if;
|
| |
In numeric expressions, the or operator performs a logical or operation of the corresponding bits of two integral values and returns the result.
|
result = status or 255;
|
|
xor
|
In boolean expressions, the result is true if either of the operands is true, and false if both of the operands are true or both operands are false.
|
if printer xor screen then
run report ‘Customer List’;
end if;
|
| |
In numeric expressions, the xor operator performs an exclusive or operation of the corresponding bits of two integral values and returns the result.
|
result = status xor 255;
|
|
not
|
In boolean expressions the not operator is used to complement (reverse) the value of a boolean expression.
|
if not enabled, then
warning “Printing not enabled.”;
end if;
|
| |
In numeric expressions, it performs a logical not operation on each bit of an integral value and returns the result.
|
result = not status;
|
|
implication or conditional (imp)
|
In boolean expressions, the implication operator examines the first operand. If it is true, the value of the second operand is returned; otherwise, the value true is returned.
|
result = a imp b;
|
|
Operator
|
Description
|
Example
|
|
unary minus (-)
|
In numeric expressions, the unary minus operator (-) indicates a negative value.
|
neg_val = –10;
|
|
addition (+)
|
In numeric expressions, the result is the sum of the two values.
|
total = subtotal + 5;
|
| |
In string expressions, the result is the concatenation of the first and second strings.
|
name = “Steve ” + “Jones”;
|
| |
In date expressions, a numeric quantity may be added to a date to form a new date. The numeric value is treated as a number of days.
|
due_date = sysdate() + 30;
|
If then…end if
The if then…end if statement is one of the structures you can use to make decisions. The if then…end if statement evaluates boolean expressions and, based on the results, executes a set of sanScript statements.
The following script uses an if then…end if statement to execute a set of statements based upon the value of the Purchase Amount field.
if 'Purchase Amount' > 'Credit Limit' then
    error "Credit limit exceeded. Can't process the transaction";
    'Transaction Complete' = false;
else
    'Transaction Complete' = true;
end if;
If the purchase amount is greater than the credit limit, an error message is displayed and the Transaction Complete field is set to false. Otherwise, the Transaction Complete field is set to true.
Case…end case
The other decision structure you can use in scripts is the case…end case statement. Like the if then…end if statement, this statement allows a series of statements to run on a conditional basis.
The following script uses the case…end case statement to o set the rebate amount to be paid to customers based upon their total purchases for the fiscal year.
case 'FY Total Purchases'
    in [-99999 to 999]
    'Rebate Award Amount' = 0;
    in [1000 to 2999]
    'Rebate Award Amount' = 15;
    in [3000 to 4999]
    'Rebate Award Amount' = 25;
else
    'Rebate Award Amount' = 50;
end case;
The case…end case statement makes it easy to run sanScript statements based on ranges of values
Loop structures
In cases where you want a set of sanScript statements to be executed repeatedly, you will use a loop structure. Several loop structures are available in sanScript.
For loop
The for loop iterates a variable through a specified range of variables. They are useful when you need to use the value of the variable being iterated, such as for an array index.
The following script uses a for do…end for statement to set the fields of the Monthly Total array to 0.
local integer i;

for i = 1 to 12 do
    'Monthly Total'[i] = 0;
end for;
Repeat loop
The repeat loop runs a set of sanScript statements, then tests a boolean condition to determine whether the loop should be repeated. Using a repeat…untilstatement ensures that the statements within the loop will be run at least once.
The following script uses a repeat loop to read through all of the records in a temporary table.
get first table Temptable;
repeat
    get next table Temptable;
until err() = EOF;
While loop
The while loop tests a boolean expression. If the expression is true, the set of sanScript statements in the loop is run. Using a while do…end while statement ensures that the condition of the loop is tested before any of the statements within the loop are ever executed.
The following example uses a while loop to read through all of the records in a table.
get first table Customer_Master;
while err() = OKAY do
    {Not at the end of the table, so read the next item.}
   get next table Customer_Master;
end while;
